

Open a new image in PSP, 5 x 2 inches and transparent, and 24 bit.
Click on your text tool and use the typewriter font.
Right Click Here to download the font. After right clicking, choose the option "Save Target As", and in the box that pops up, click on the dropdown arrow in the 'save as type' area and put "all files" there and download.
Use whatever colors you like.
Make sure (with this particular font) that kerning is set to 75.
Leading is 0, and Auto kern is unchecked. Vector and Antialias are choosen.
OK the box, then click on "Layers / Convert to Raster Layer" and center the text.
Now click on "Layers / Duplicate" and make sure there are double the frames for every letter you have in your name.
There are 6 letters in my name, so I made 11 duplicates. Eleven plus my original frame = 12 frames.
Count the layers to make sure it's right.
The layer on the bottom will probably be blank. If it is, delete it and don't count it. If you hover your mouse over each layer, a little picture will pop up. If that pic is blank, delete that layer.
Now bring up your Layer Palette and click on "Layers / View / None".
Go to the layer palette and HIGHLIGHT the first layer...the one at the top of the layer palette.
The X will come off of the eyeglasses and it will be viewable.
Here's what it will look like.
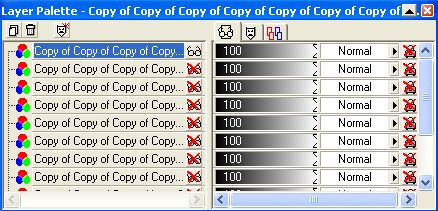
See the scroll bar to the right in the layer palette? Make sure you scroll all the way to the top so you know it's the first layer you are going to highlight. Or you can drag the box bigger so all layers are viewable on the palette itself.
Now drag the layer palette in a corner so it won't be in the way while you are working with the letters.
But don't get it off of the screen. You will need it.
Now click on your freehand tool.
Now click on the toggle tool option window and choose "Point to Point" under the selection type.
Now get rid of the toggle tool option window.
Now surround your first letter with the freehand tool, being careful not to touch any other letters.
Then click on the letter and the ants will be surrounding the letter.
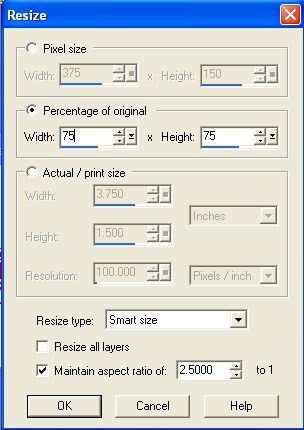
Now click on "Image / Resize" and choose the settings as below.
Now click on "Selections / Select None".
Go back to your layer pallete and click on the eyeglasses on your first layer, which will put an X on the eyeglasses, which hides that layer.
Now HIGHLIGHT the third layer on your layer palette. That will take the X off of the eyeglasses. But make sure you don't just take the X off, but also highlight the layer.
We will be working with every other layer.
Now surround your second letter with your freehand tool and apply the same resize settings as your first letter.
Keep doing these steps with all the letters you have in your text.
*** Just make sure that you remember to hide all layers but the one you are working on, and that you HIGHLIGHT the layer you are working on. ***
When you are done, click on "Layers / View / All".
Now click on "File / Save As" and save it where you want and name it what you want. Just make sure you save it as a psp file.
Now open up Animation Shop and click on "File / Open".
Navigate to the folder you saved your file in and open it.
Maximize the animation.
Now click on "Edit / Select All", then "Animation / Reverse Frames"
Click on the View Animation tool to view it.
Now you probably want it slower, so close out the view animation frame.
Now click on "Edit / Select All" and right click on the first frame and choose "Frame Properties".
The higher the number, the slower the animation.
I chose 30 for this one.
All of the frames will be at 30 because you selected all of them before changing the properties of the first one.
Now you may want to crop the animation before you save it.
Click on your crop tool then drag it around the animated area.
Double click inside the box and it will crop.
Check the animation again to be sure you didn't crop anything off.
Now save it.
Hope you found this tutorial useful! Please do not pass my tutorials around. Instead, give a link to this site.
~Summer °Ü°